
This lab uses visual studio code. Install it if you do not have it already. It is a good idea to organize your files from the start, such as creating a directory for RISC_V files, and directory under that for each assignment.
Before we begin Lab 5, refer to Lab 4 to get a quick reminder on commands
like li (load immediate), add, jal (jump and link).
You should also have an understanding
of how we print the values by ecall (environment call),
similar to "call printf".
Download the code found at HelloWorld.S. As the comments indicate, this is based on a couple of examples and modified. See here and here for the originals.
Copy the code to your workspace.
On my system, I have a directory called "programs/RISC_V", then
another directory called "hello_world" under this, with the .S file
under that. That is, the full name is
~/programs/RISC_V/hello_world/HelloWorld.S.
However, you should use whatever makes sense for you.
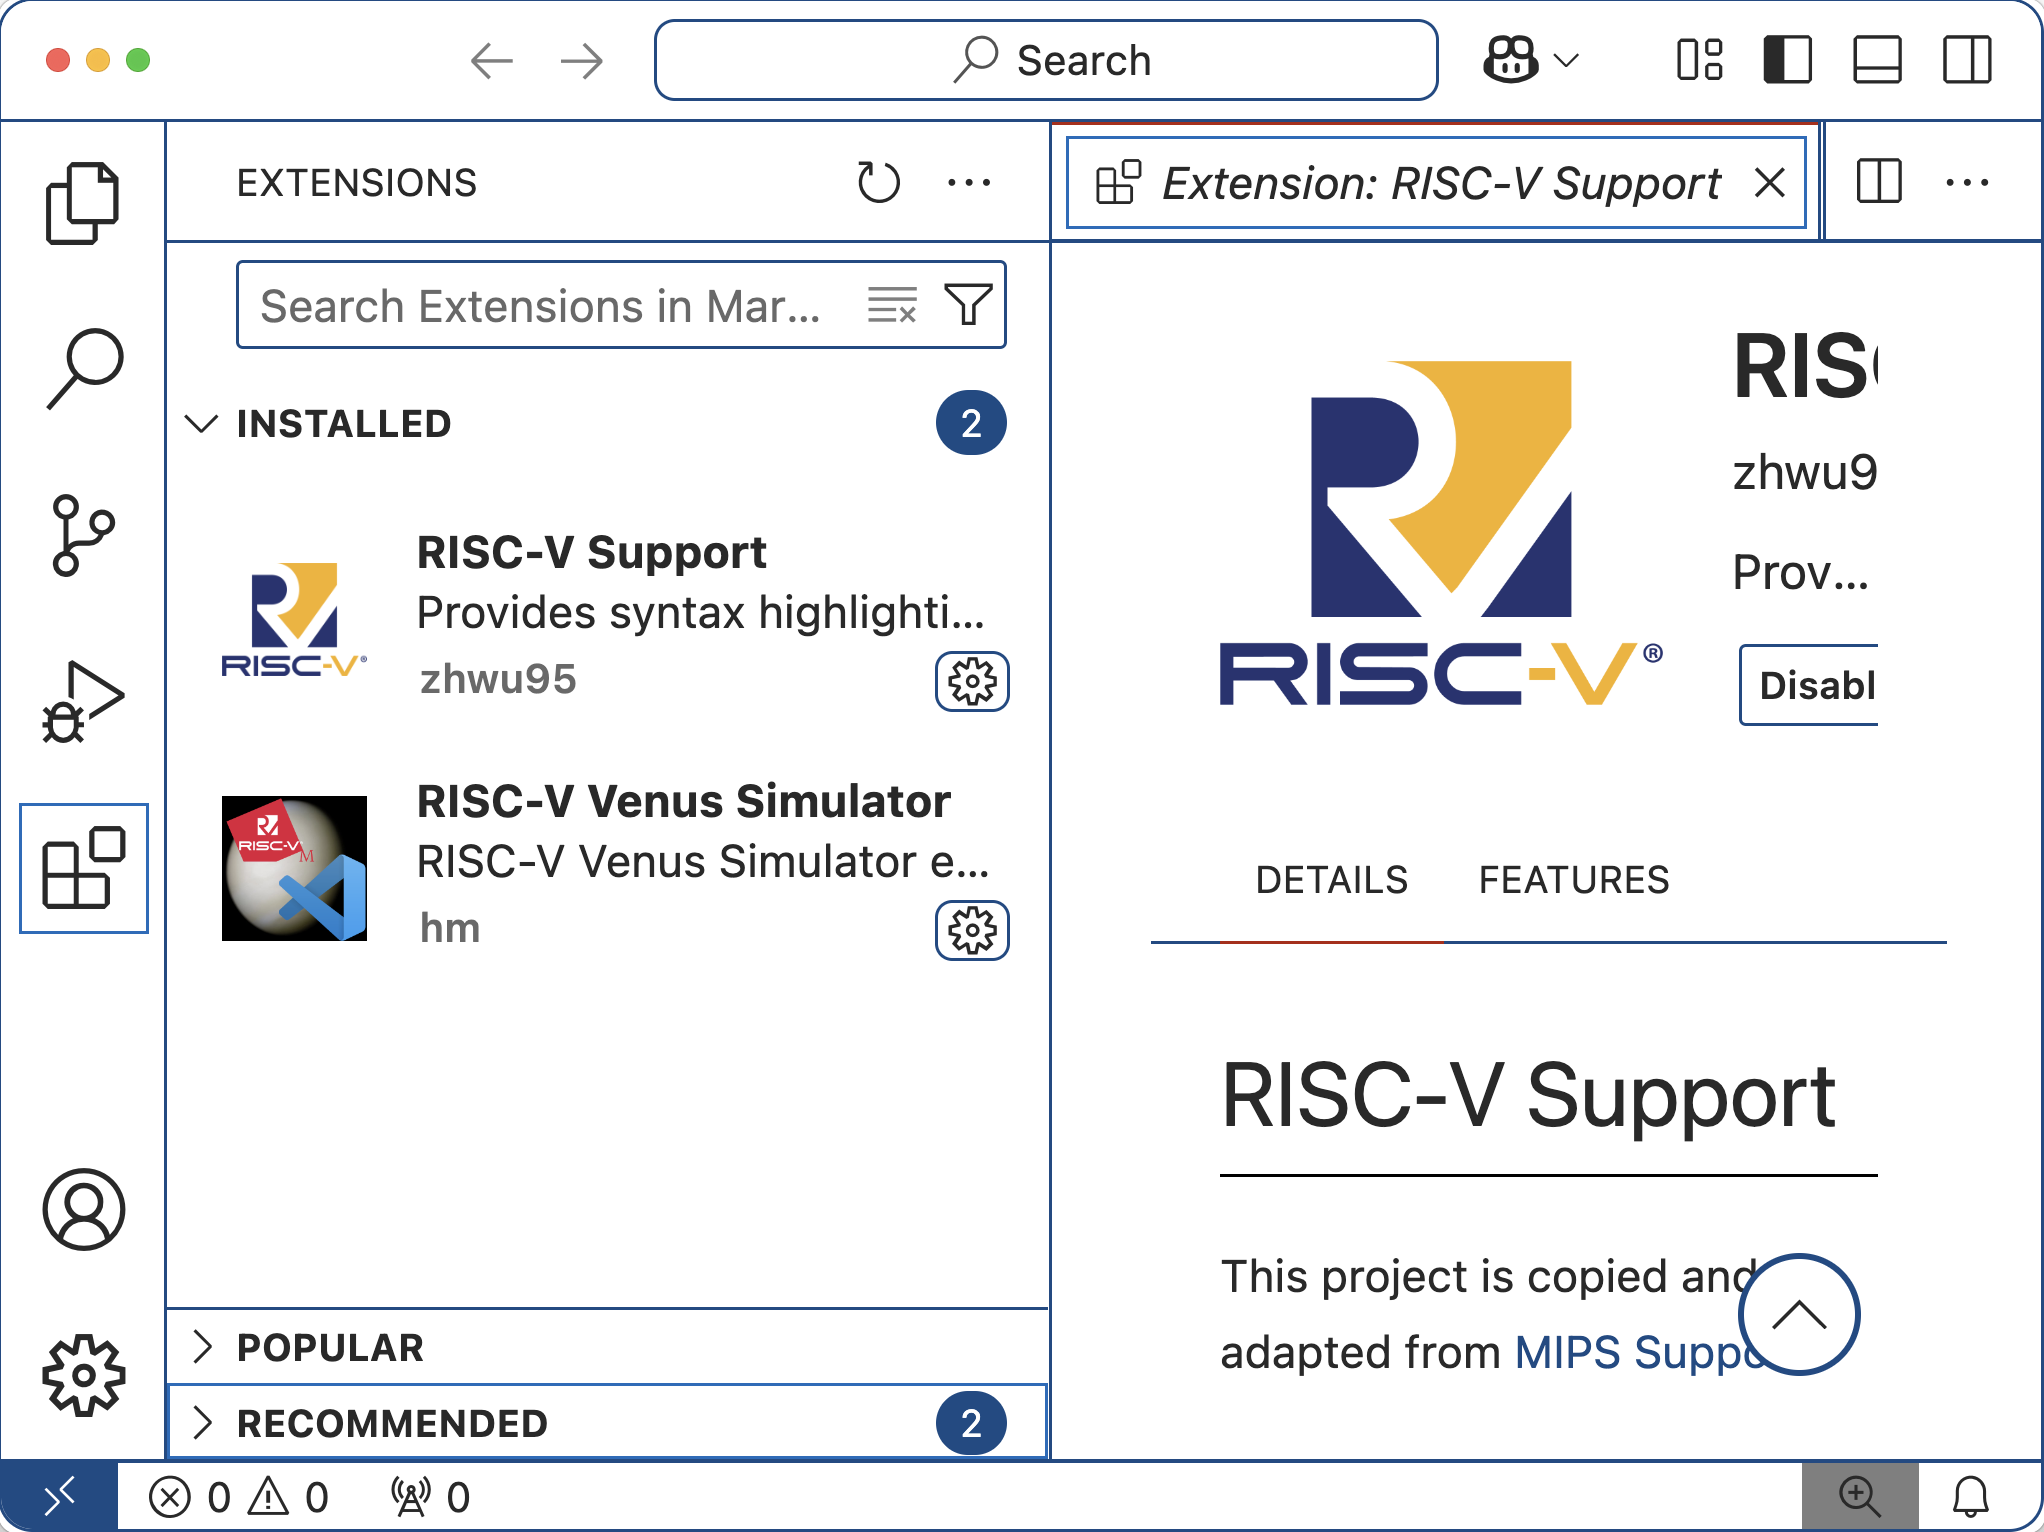
Open the file in VSCode.
Note that registers are x0, x1, x2, etc. Register x0 always has a value of 0. Also, Venus supports alternate register names a0, a1, s0, s1, etc. The "a" stands for argument, used for interfacing with other code (like calling a subroutine). The "s" stands for saved, meaning that its value will be preserved even if calling a subroutine. There are also "t" registers (e.g. t0, t1, t2) meaning temporary.
Let's take a look at the code.
    #
    #  This is a comment.
    #  You should put your name on any code that you create/modify.
    #  If you use someone else's code, also include the original author(s),
    #  and any other relevant info.
    #  Begin code modified from https://....

    #  End code modified from https://....
x0 to another
register called s0. Register x0 always has the
value 0, which is just an efficient way to get this value.
mv s0, x0
loop: addi s0, s0, 1 # s0 holds the count
loop: specifies a label. Further down in the code,
you will see j loop which says to unconditionally jump
to the "loop" label. If you examine the code, you will probably notice that
it is an infinite loop. Normally, we would not want this.
However, you will be able to stop it in the simulator.
The next part of that line says addi s0, s0, 1 which says
to add the immediate value of 1 to the s0 register's value,
and store the result in the s0 register.
You may have noticed a pattern: destination, source,
and possibly a second source.
The mv s0, x0 is much like s0 = x0 in another language.
Similarly, addi s0, s0, 1 is much like s0 = s0 + 1
in another language.
You know that the pound-sign starts a comment, so the assembler ignores everything after that. Comments help anyone reading the code to understand exactly what it is doing. While it is possible to read the code and know what the code does, the instructions alone do not inform you about the intent. The comments will help in that regard.
The next three lines go together. As the comments indicate, these
instructions will print a string.
The "environment call" (ecall) is used to work with
the OS and/or libraries. But we have to specify what we want it to do,
and the code that is called uses the registers to figure out what we mean.
In this case, we give it the value 4 in register a0
to indicate that we want to print a string, and put the address of
the string to print in a1.
    li    a0, 4            # print a string
    la    a1, helloworld   # load address of helloworld string
    ecall
printf command in C,
the print command in Python, or
the System.out.println command in Java.
We define the label "helloworld" a bit later, in the
.data section.
  .data            # Data section, initialized variables
  helloworld:      .string "Hello RISC-V World\n"
There are two more blocks of code to examine.
The next three lines say to print an integer.
We use a0 again to specify what operation we want to do, and
use a1 to specify the data. This time, instead of a string,
we will print the value 42.
    li    a0, 1      # print an integer
    li    a1, 42     # See The Hitchiker's Guide to the Galaxy
    ecall
The last block of code that we discuss here is the following. There are a couple more blocks in the program, but you should be able to figure out what they do.
    li    a0, 11     # print a character
    li    a1, 32     # space (the character to print)
    ecall
Questions:
    li    a0, 1
    li    a1, 100
    ecall
    li    a0, 11
    li    a1, 100
    ecall
Click on the three dots next to "run and debug", then choose "Debug Console".

You should then click on Terminal
Now select "Run" then "Start Debugging" from the drop-down menu at the top
(or top of your window).
![]()
You should see a group of buttons appear above the code.
The first button is "Continue" (if you hover your pointer over a button
in VSCode, it will say what it is).
The second button is "Step Over", then "Step Into" after that,
then "Step Out", then "Restart", and finally "Stop".

When you "step" through the program, you should see it advance line by line.
You will not see any output until it gets to one of the ecall
instructions.
Repeat stepping through until you have executed three iterations of
the loop. Your output should look like the following.
Include your output in your lab report.
Also, include a screen-shot of VSCode with the HelloWorld.S program
in your lab report.
-------------------------------------------------------------------------------------------
Starting program /Users/mweeks/programs/RISC_V/hello_world/HelloWorld.S

Hello RISC-V World
42 1
Hello RISC-V World
42 2
Hello RISC-V World
42 3

Stop program execution!
-------------------------------------------------------------------------------------------
x10 and x11
as you step through the code.
Give an example of one line of the code, and what effect it has on
x10.
Give an example of one line of the code, and what effect it has on
x11.
Note about submitting your work: The lab instructions say to "Turn in the log as a text file", but in this lab, you did not need to connect to the server, and thus do not have a log. In cases like this, turn in a copy of your code, and turn in your output as a text file. If iCollege gives you trouble about turning in your code, rename it to a .txt extension, and it should work. Remember that we will grade your lab report so it is vital to turn that in. The other files (your code, a text version of any log file, etc.) are to document your work in case we need more information.
What we learned in this lab:
li,
ecall, as well as directives like .data,
and labels.